2. Create Entry
Let's create an entry!
Entries are the ❤️ of this entire application, and can be all that you need and use. The other two sources to input and organize your journal are forms, and the graph.
Entries will allow stats:
Stats Available with Entry
| Feature | Class | Stats |
|---|---|---|
| Entries | Primary Visualizations | Searchable Content |
| Habit Display Board | ||
| Total Duration Totals | ||
| Total Duration Trends | ||
| Search by tag | Emotion Scores | |
| Ratings Scores | ||
| Part Of Speech |
Eventually, making entries should be super easy, and can be made in seconds. How long they take should depend on how much you have to say about what you did.
- Make an entry.
- Setup your first graph.
- Add snapshot from the graph.
Make your first entry
Open Sheet
Click Post

Fill Out Sheet
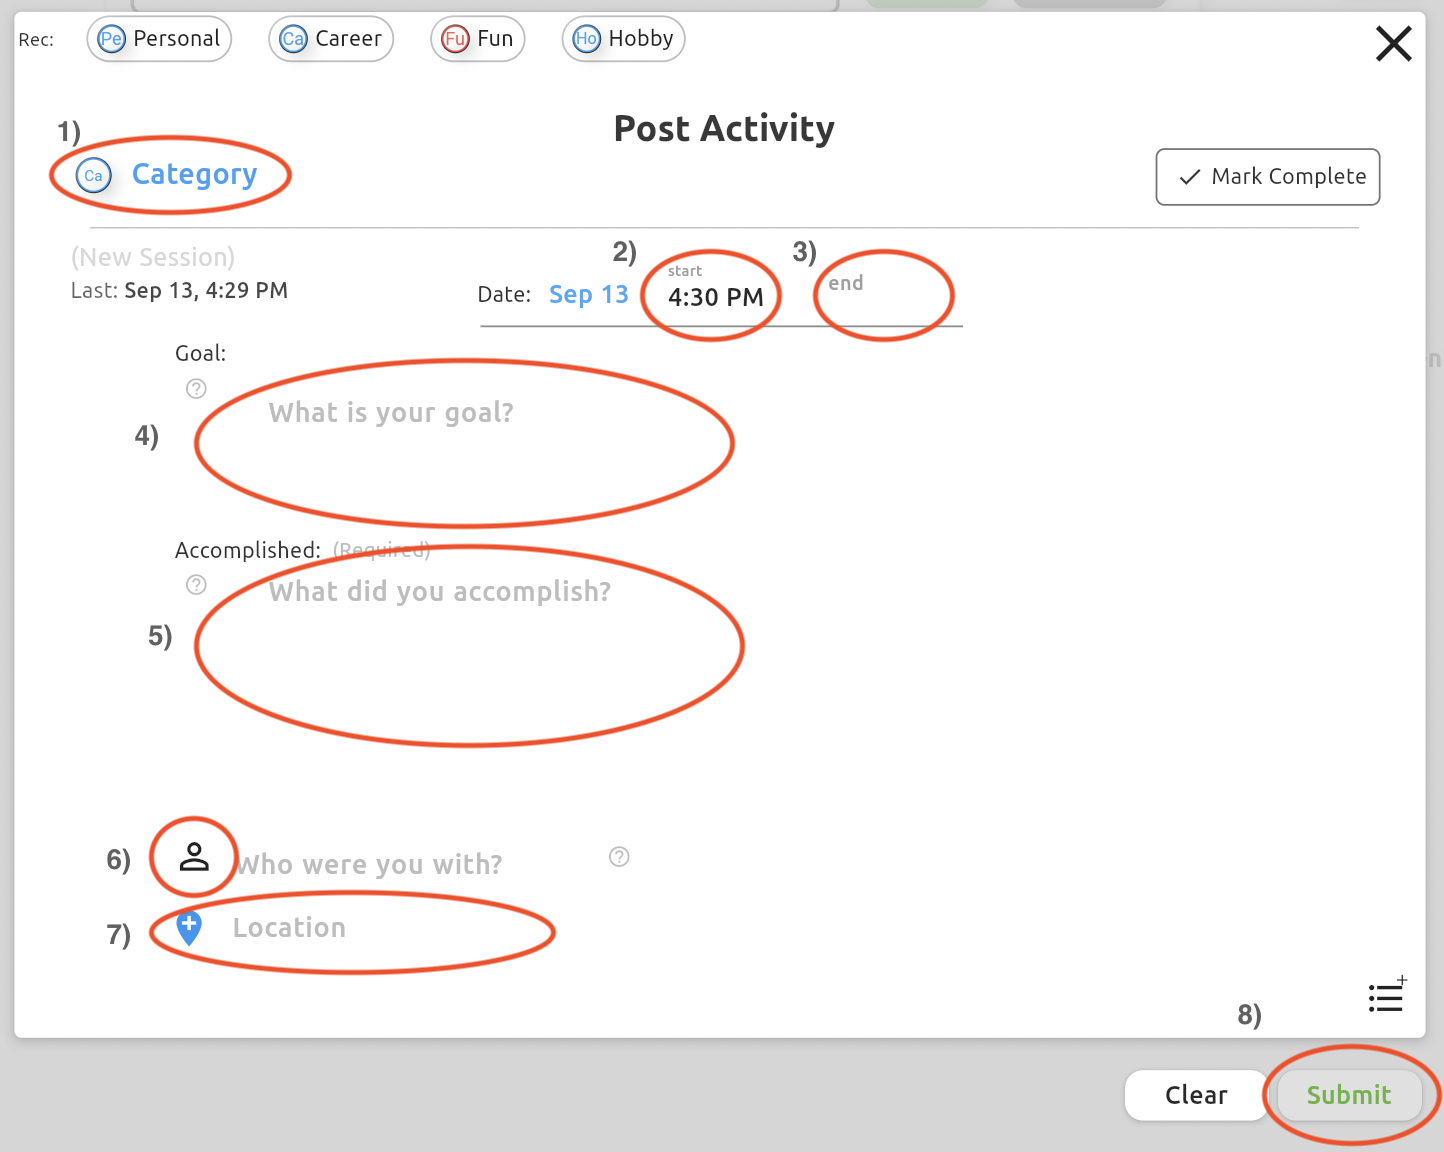
1. Category 🏃♀️
- Select one from the Rec: menu from the starting list: Personal, Career, Fun, Hobby.
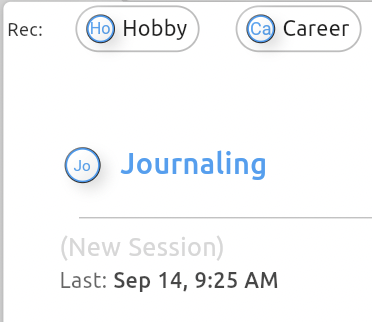
- OR Type a category into the field, like "Journaling".
- If you typed a new category, be sure to Press
Enterkey!
Press Enter instead of Tab. Your category field should have a small icon to its left, as shown in the second image.

If the category is left as it is in the first image, the entry sheet will not submit.
2,3. Start/End Time ⏱
This field is meant to set the duration of your activity. Since we are just making a quick entry, it is okay if these values are the same.
Now:
- Field 2 will autoload the current time.
- Fill in field 3
- When you click into the field, a box popups.
- You can type in your own time, like
8:30 AMor clickNowfrom the box.
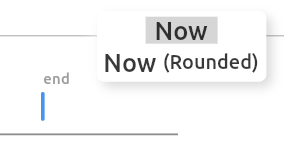
To simplify durations, you can round to the nearest 5 minutes, so there is a rounded option from the drop down menu that appears when the field is selected.
4. Goal 💪
In the Goal section, type:
Write my first entry.
5. Accomplished 😴
In the Accomplished section, type:
I wrote my first entry. It's gone (adjective).
adj. options: 1) swimmingly, 2) annoyingly, 3) 🔥
6. Person 🤠
The Person field is a place to say who you were with.
- Tap the person icon, to make fill in the field as 'Solo'.
- If you are with others, double tap the icon to make it say 'Group'.
- You can type the exact name of who you were with.
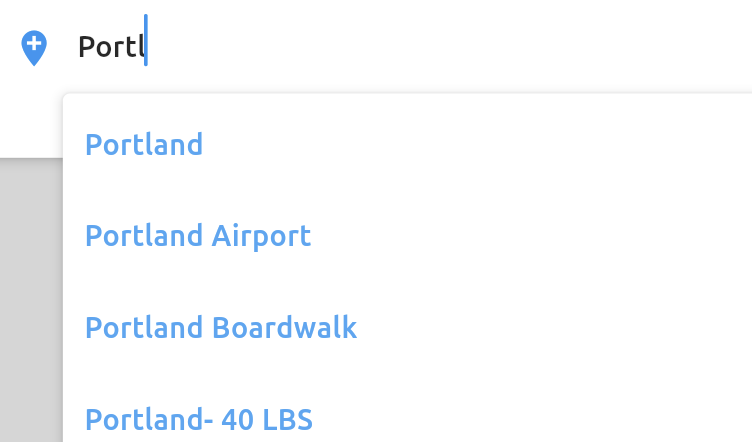
7. Location 🌎
The Location field is an opportunity to say where you were at while doing this.
No location data is recorded from this application. As writers, we are far more concerned with language, and what places are called, rather than geospatial coordinates.
The locations you type into this field can be accessed through a dropdown menu later to help you recall what names you gave places. Also, just to make the typing easier.
8. Submit! 🚀
Finally, your submit button should appear green, instead of grey, and you can submit your entry.
Hit Submit!
If you did type in your own category for what you were doing, a pop up will appear that looks like this:
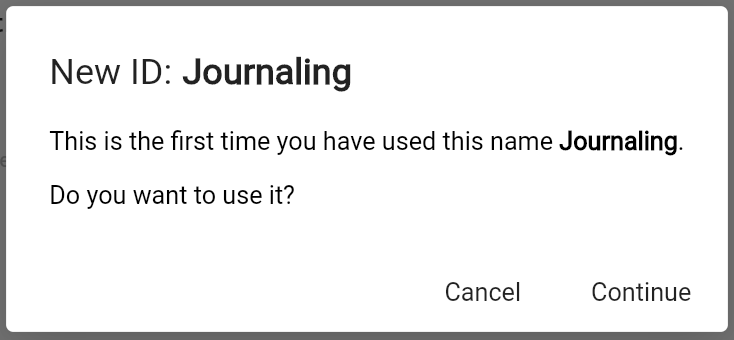
Press Continue to create the new activity.
If nothing happens when you press Submit try:
- Check that your category is filled out, and shows the circle avatar next to it on the sheet.
- Check that your time is in the text format.
Speed up your entries by adding only the required fields.
- Category
- Start Time and End Time
- Accomplished
Entries are not always made through the counter process, and are sometimes written after the fact. Not everything has a goal! So, the goal field is not neccessary. It is okay to leave that section blank, and to only write what you did.
For more information on creating entries, what you can do with them, and how they get accounted in the rest of the application, see the entries guide. (Guide coming soon...)